震惊!他们居然用python来做这些事情....
相信在日常生活中,平常大家聚在一起总会聊聊天,当然热爱工作的我们还是会很认真的进行技术探讨(认真脸),但总有一些人,会喜欢谈男女朋友的轶事呀,讨论一下这个男生什么星座呀,那个女生的表情包真可爱呀…今天就来满足各位的需求,通过python来做这些事情~
#星座算命#
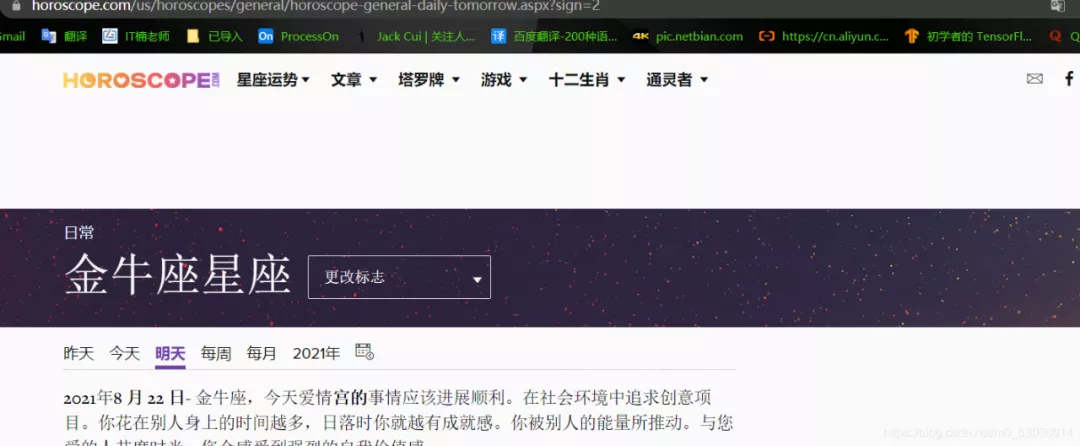
第一步呢,先找到一个做星座测试的网站:https://www.horoscope.com/us/index.aspx
大家就能看到这个页面了

我们今天呢,就先做一个通过星座来得知三天的运势的小玩意,
这里有十二个星座,我点了第一个和第二个进去,也就是白羊座和金牛座:
就会发现一个规律

通过观察网址的链接,我们可以发现https://www.horoscope.com/us/horoscopes/general/是每个星座都共有的一段网址,
horoscope-general-daily-today.aspx?sign=1
我们只需改变today和sign={}对应的值就可以获取到每个星座对应的网址了
https://www.horoscope.com/us/horoscopes/general/horoscope-general-daily-today.aspx?sign=1
我们再打开金牛座的昨天的运势,发现daily-后面变成了tomorrow
我们这里只获取三天的,也就是昨天,今天,明天,我们只需在控制台输入需要查询的日期就行了。
第二步,获取内容
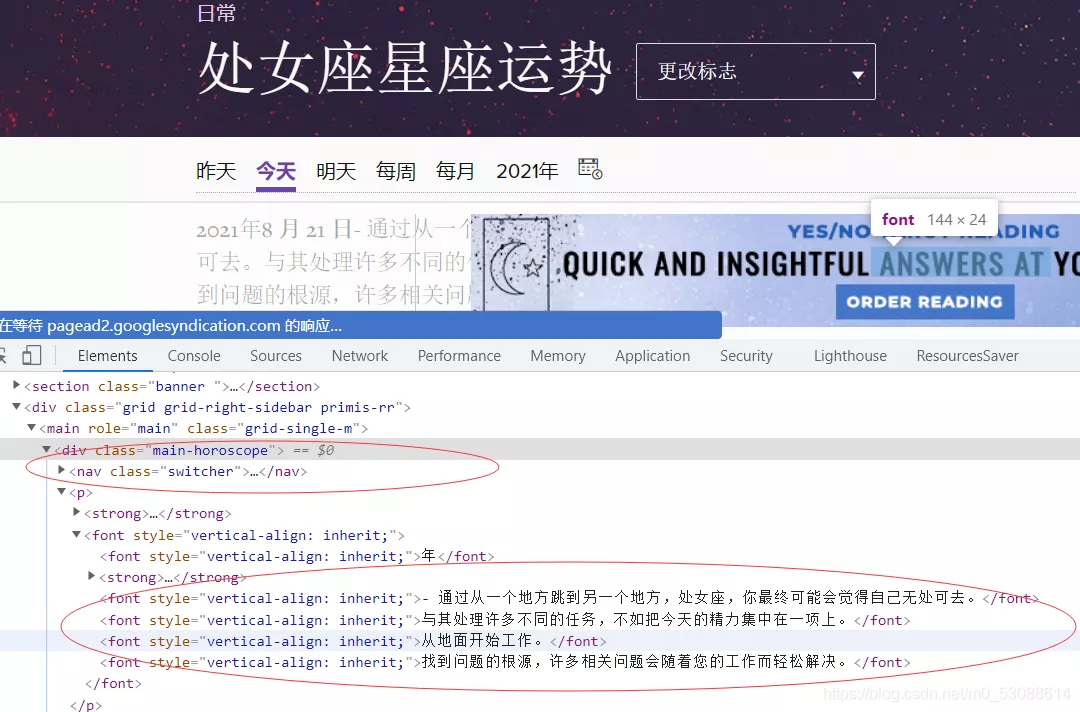
从图片我们可以得到我们所需的内容,这个是很基础的爬虫了,没有反爬,我们直接上代码了。
第三步,写代码
from bs4 import BeautifulSoup
import requests


def horoscope(zodiac_sign: int, day: str) -> str:
    url = (
        "https://www.horoscope.com/us/horoscopes/general/"
        f"horoscope-general-daily-{day}.aspx?sign={zodiac_sign}"
    )#获取需要查询的星座的链接
    soup = BeautifulSoup(requests.get(url).content, "html.parser")
    return soup.find("div", class_="main-horoscope").p.text#返回得到的内容——来自上天的指示
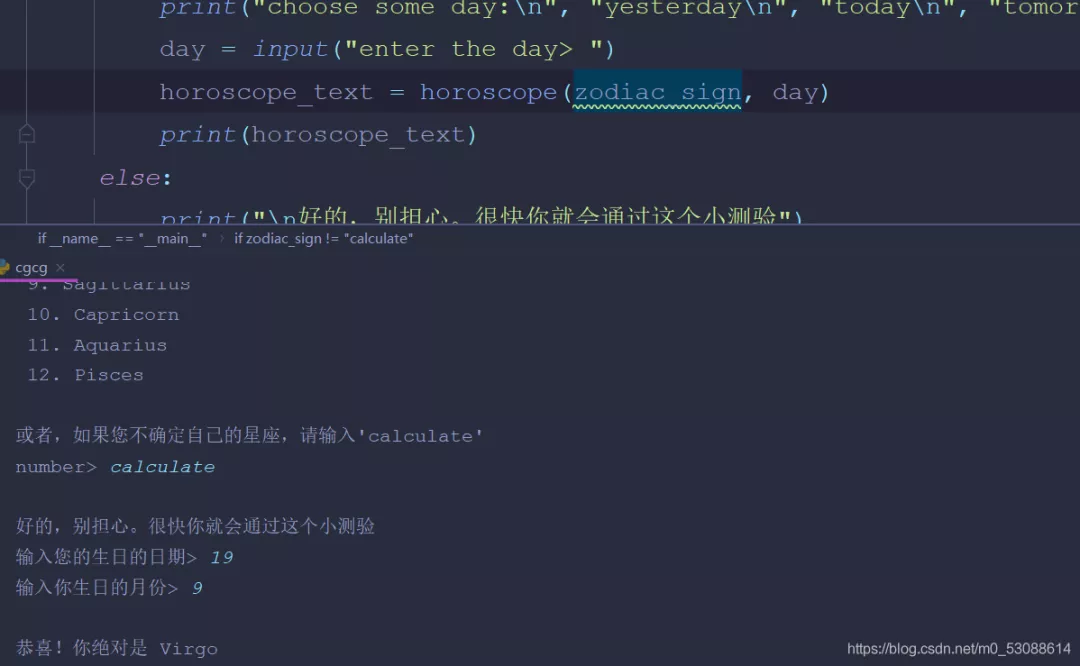
如果有小伙伴不知道自己的星座怎么办呢,所以我们就还需要一个函数去查询星座:
def check_sign():#得到星座
    your_birth_day = input("输入您的生日的日期> ")
    your_birth_month = input("输入你生日的月份> ")
    if (int(your_birth_month) == 12 and int(your_birth_day) >= 22) or (
        int(your_birth_month) == 1 and int(your_birth_day) <= 19
    ):
        sign = "Capricorn"
    elif (int(your_birth_month) == 1 and int(your_birth_day) >= 20) or (
        int(your_birth_month) == 2 and int(your_birth_day) <= 17
    ):
        sign = "Aquarium"
    elif (int(your_birth_month) == 2 and int(your_birth_day) >= 18) or (
        int(your_birth_month) == 3 and int(your_birth_day) <= 19
    ):
        sign = "Pices"
    elif (int(your_birth_month) == 3 and int(your_birth_day) >= 20) or (
        int(your_birth_month) == 4 and int(your_birth_day) <= 19
    ):
        sign = "Aries"
    elif (int(your_birth_month) == 4 and int(your_birth_day) >= 20) or (
        int(your_birth_month) == 5 and int(your_birth_day) <= 20
    ):
        sign = "Taurus"
    elif (int(your_birth_month) == 5 and int(your_birth_day) >= 21) or (
        int(your_birth_month) == 6 and int(your_birth_day) <= 20
    ):
        sign = "Gemini"
    elif (int(your_birth_month) == 6 and int(your_birth_day) >= 21) or (
        int(your_birth_month) == 7 and int(your_birth_day) <= 22
    ):
        sign = "Cancer"
    elif (int(your_birth_month) == 7 and int(your_birth_day) >= 23) or (
        int(your_birth_month) == 8 and int(your_birth_day) <= 22
    ):
        sign = "Leo"
    elif (int(your_birth_month) == 8 and int(your_birth_day) >= 23) or (
        int(your_birth_month) == 9 and int(your_birth_day) <= 22
    ):
        sign = "Virgo"
    elif (int(your_birth_month) == 9 and int(your_birth_day) >= 23) or (
        int(your_birth_month) == 10 and int(your_birth_day) <= 22
    ):
        sign = "Libra"
    elif (int(your_birth_month) == 10 and int(your_birth_day) >= 23) or (
        int(your_birth_month) == 11 and int(your_birth_day) <= 21
    ):
        sign = "Scorpio"
    elif (int(your_birth_month) == 11 and int(your_birth_day) >= 22) or (
        int(your_birth_month) == 12 and int(your_birth_day) <= 21
    ):
        sign = "Sagittarius"


    return sign
接下来可以实操啦!!!
哈哈,是不是很有意思呀~
#“哄”睡服务#
事情是这样的:某天晚上,女朋友让你十二点催她睡觉。
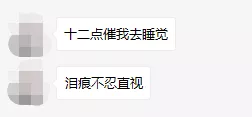
不过,可是你实在太困了,熬不下去…… 是吧?女朋友哪有睡觉重要?

但,女朋友的命令,是不敢违抗的……

但是睡觉也不能缺!
这时候该怎么办呢?是时候让Python登场了!
这次我们来做一个自动发送微信的程序,在深夜十二点的时候给女朋友发去消息,也算是尽了一个男朋友的义务了。
第一步,安装和导入
我们需要两个模块:apscheduler,pyautogui
快捷键 Windows+r 打开运行控制框,输入 cmd,进入命令行,输入:
pip install apscheduler
pip install pyautogui
导入:
import pyautogui
from datetime import datetime
from apscheduler.schedulers.blocking import BlockingScheduler # 阻塞当前进程的调度器
# blocking类型调度器会阻塞当前进程,若你想要后台运行的调度器,可以使用以下代码:
# from apscheduler.schedulers.background import BackgroundScheduler
第二步,实现
首先我们来实现自动发送消息
pyautogui 是一个非常强大的库,可以操作鼠标和键盘。我们将用它来完成自动操作电脑。
先来做一些基本设置:
pyautogui.PAUSE = 1 # 设置每一步操作的间隔(秒),可防止操作太快
然后我们登录微信,最小化。
接下来我们把鼠标放到微信的任务栏图标上,运行以下语句,获取此时光标的坐标,返回一个Point对象:
print(pyautogui.position()) # 打印坐标,Point(x=148, y=879)
icon_position = pyautogui.position() # Point(x=148, y=879)
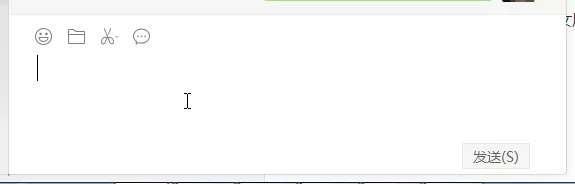
打开微信,选择女朋友的回话窗口,将鼠标放在输入框上,同样获取光标坐标,为了将焦点锁定到输入框以方便待会的输入。
print(pyautogui.position()) # 打印坐标,Point(x=174, y=751)
entry_position = pyautogui.position() # Point(x=174, y=751)
接下来,控制程序依次点击这两个点:
pyautogui.click(icon_position) # 默认左键单击
# pyautogui.click(148, 879)
pyautogui.click(entry_position)
# pyautogui.click(174, 751)
打开微信并锁定焦点后,我们开始输入文本。
输入文本可以有两种方式:
pyautogui.typewrite(['o', 'n', 'e', 'enter'])
在方法中传入一个列表,里面每一元素都是单个字母或特殊按键
pyautogui.typewrite('You can type multiple letters in this way')
传入字符串,但不能同时打印字母和特殊按键。
这两种方式都不能直接输入中文,所以只能依靠你的输入法来输入中文了。
pyautogui.typewrite([*list('zhengzai '), *list('jinxing '), 'shift', *list('pyautogui'), 'shift', *list('shiyan '), 'enter'], 0.1) # 第一个参数是输入文本,第二个是输入每个字符的间隔时间
为了使我们的操作更加像人的操作,来加上移动鼠标的代码:
pyautogui.moveTo(icon_position, duration=2) # duration为执行时长,可选
pyautogui.click(icon_position)
pyautogui.moveTo(entry_position, duration=2)
pyautogui.click(entry_position)
pyautogui.typewrite([list('zhengzai '), list('jinxing '), 'shift', list('pyautogui'), 'shift', list('shiyan '), 'enter'], 0.1) # 第二个参数为按下每一个字母的间隔,可选
看看效果:

当然,若是你要输入的内容实在很多,又嫌麻烦,可以通过复制粘贴来实现:
import pyperclip


pyperclip.copy('正在进行发中文试验,看到请忽略,更不要骂傻逼') # 复制
pyautogui.hotkey('ctrl', 'v') # 按下组合键的方法,ctrl+v粘贴
pyautogui.press('enter') # 按下按键
这样,我们便完成了自动发送微信消息的功能了。
热门推荐
相关文章
联系我们